How to embed 360 photos in your Squarespace website
Show your 360 photos on Squarespace in a few easy steps
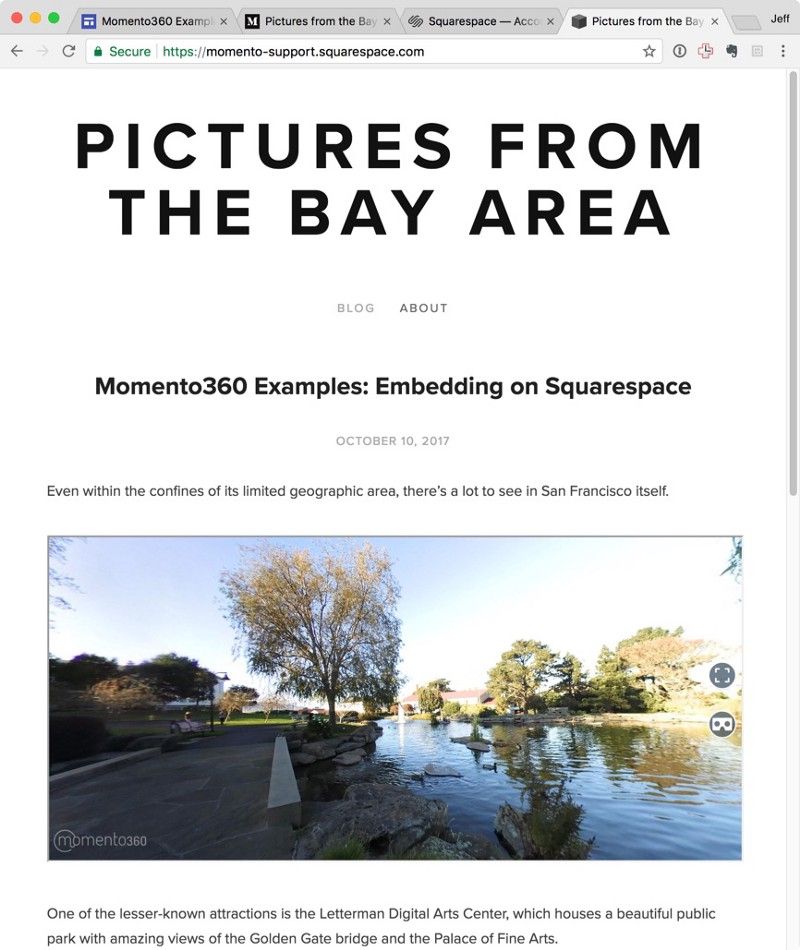
Show your 360 photos on Squarespace in a few easy steps
You’ve done the work of getting your 360 photos into the right format and resolution so they look great to you — and now you want to show your audience on the web. But how are you going to do that when most services currently assume all images are flat and non-spherical?
Never fear — it’s actually pretty easy! Here we’ll give you a step-by-step tutorial of how to embed 360s into your Squarespace website using Momento360.
1. Download your photos from your 360 camera to your computer or smartphone
Your 360 camera will have options that let you connect to your devices to make transferring photos easy. Momento360 supports any 360 images (e.g. renderings, drone panoramas, etc.)
2. Sign up for a Momento360 account if you haven’t already
Momento360 is a free, easy, and private way to upload, view, and share your 360 photos and videos all in one place (all from your browser).
3. Upload the media from your device to Momento360
Sign in, click on the camera icon in the top right corner or navigate to the My Media tab. You’ll then be prompted to choose the media you want to upload. On desktop, you can select multiple files at once to upload.
4. Select the image you want to embed
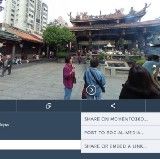
From the My Media section, click on the photo or collection you want to embed. Then click on share button and select the “Share or Embed a Link” option:
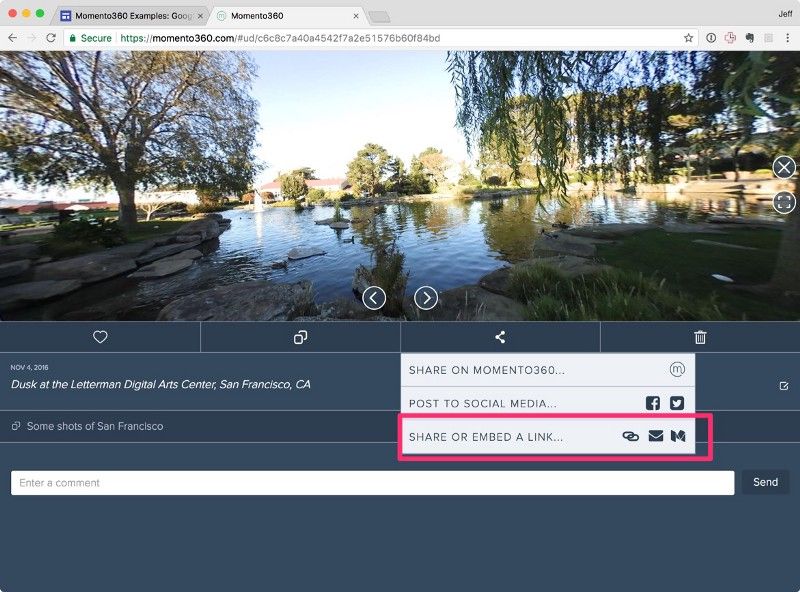
5. Generate the embeddable link
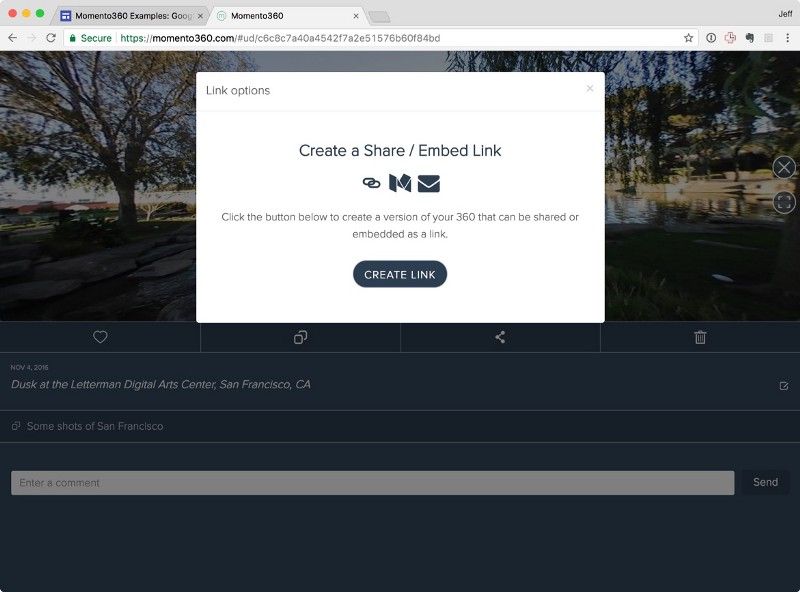
Click the “Create Link” button in the dialog that pops up.
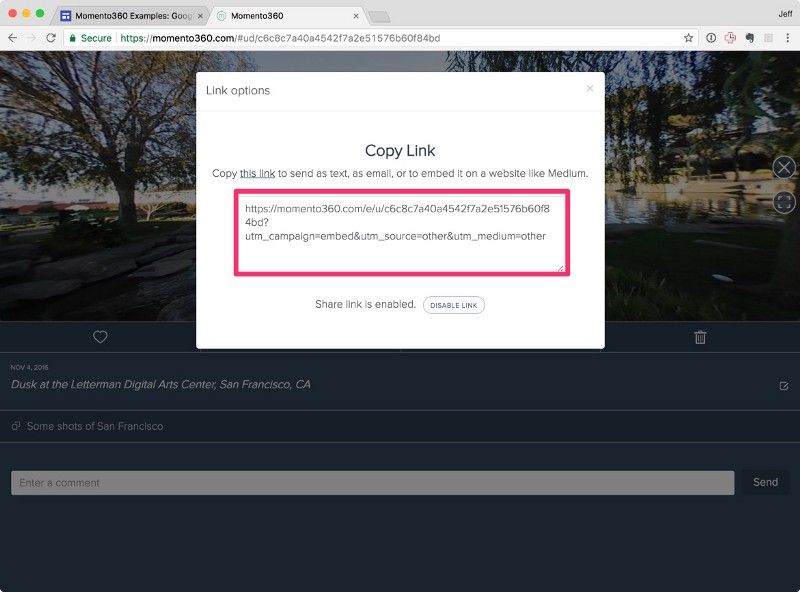
Copy the link from the text box. You’ll use this in the next step. (You can preview it by clicking the “this link” hyperlink to open it in a new browser tab.)
6. In Squarespace, add a new block where you want to add the 360
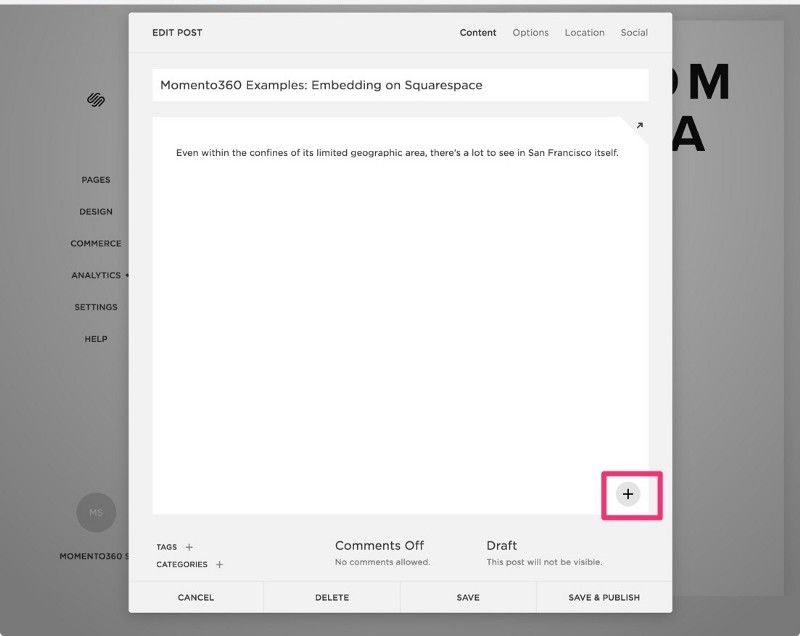
You can do it as a page element or as part of a blog post; if you’re adding it to a blog post, you’ll click the “+” button to add an element in the post itself:
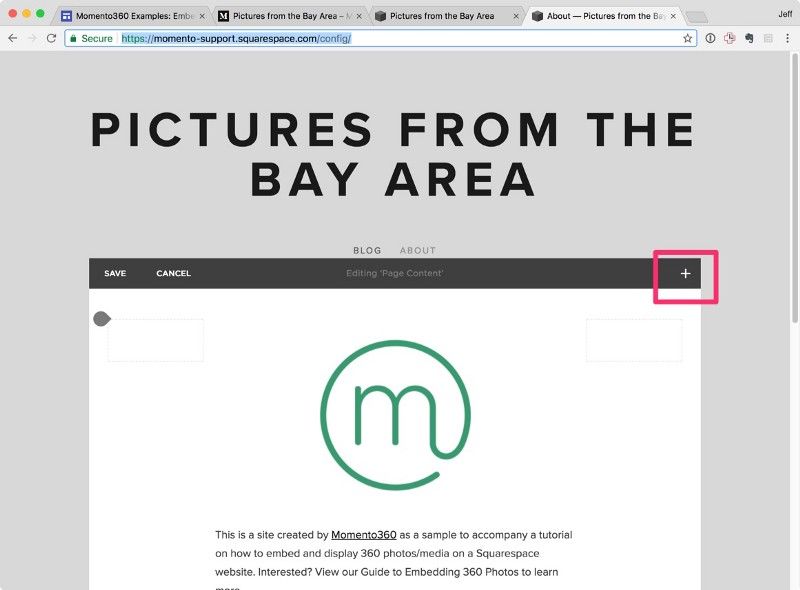
If you’re adding it as a page element, you’ll need to edit the page, and click the “+” to bring up the menu.
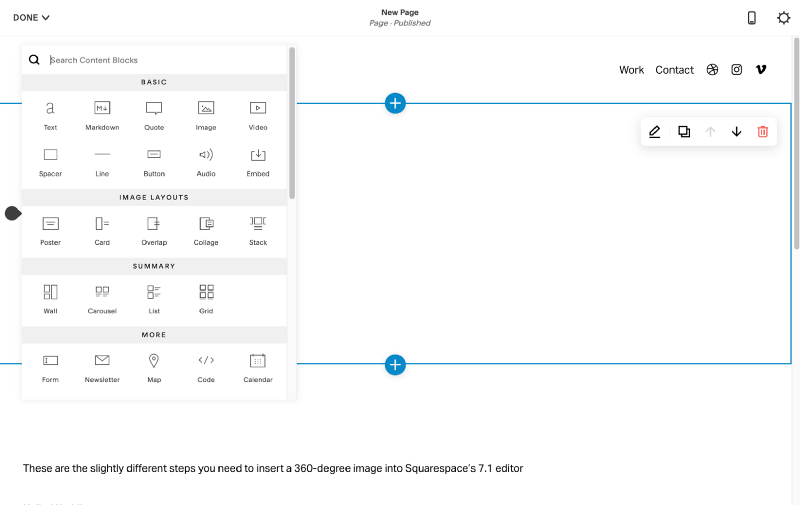
In Squarespace 7.1, you’ll find the Code block as part of the menu that pops up when you add a block:
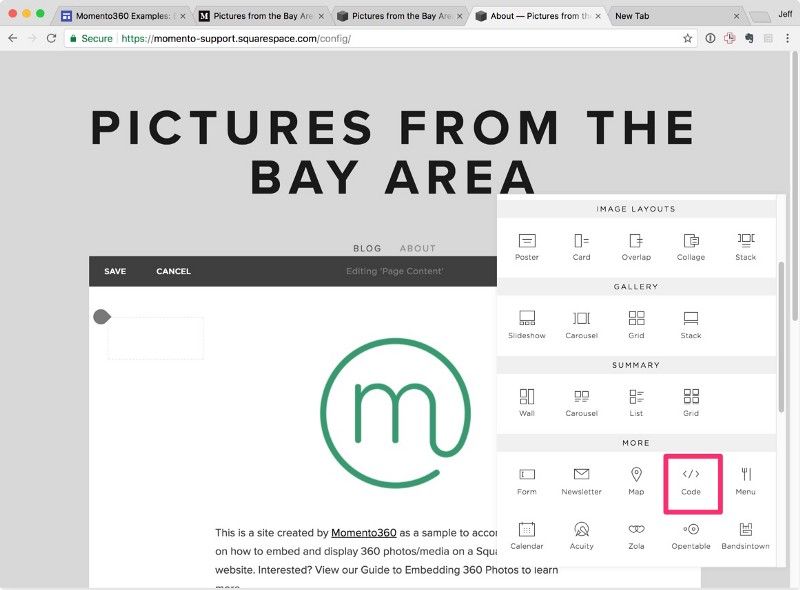
In either case, that will pop up the Content Blocks menu. You’ll need to scroll down and select the “Code” item under the More submenu.
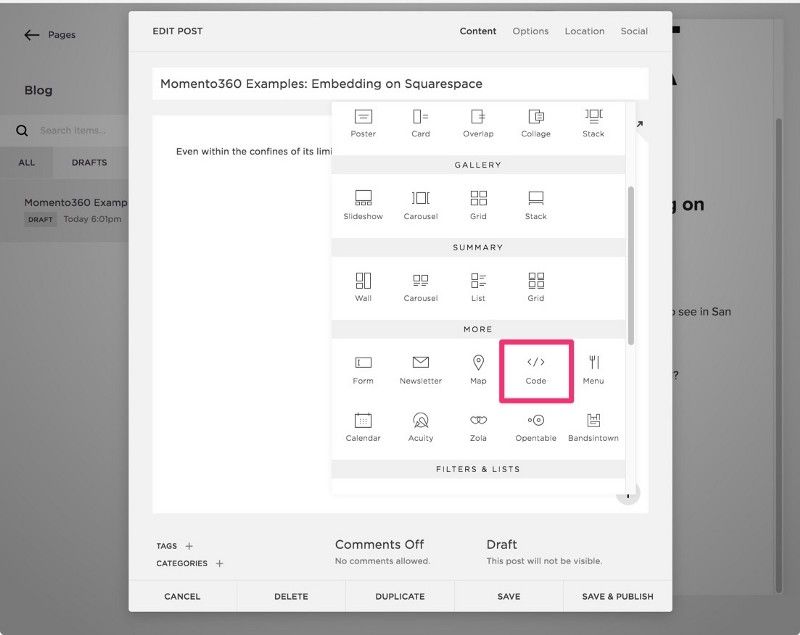
You’ll be prompted with a window to add your code. Make sure the dropdown on the right is set to HTML.
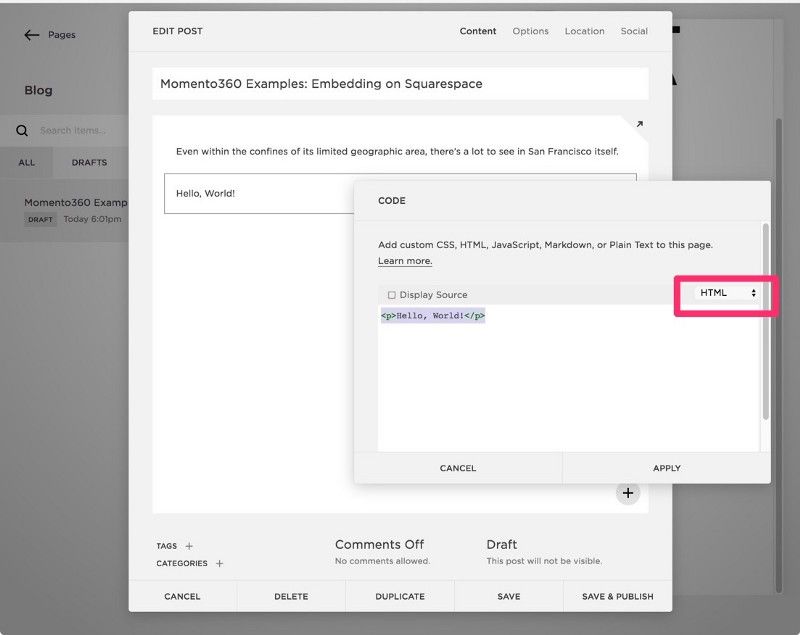
Now copy the below code snippet and paste it into the window (delete the “Hello World” text that’s there).<iframe height="350px" width="100%" allowfullscreen="true"
src="<<INSERT YOUR COPIED LINK HERE>>"> </iframe>
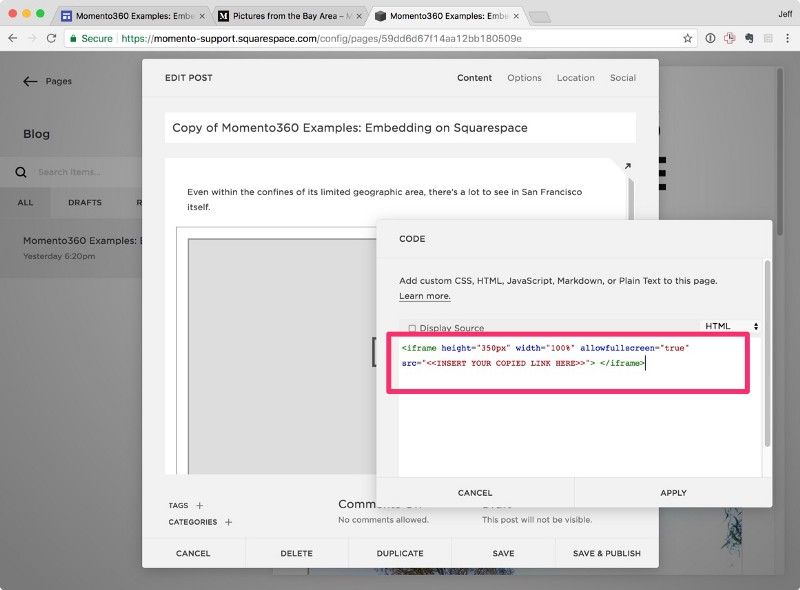
Next, take the link that you copied from Momento360 in Step 5, and replace the red <<INSERT YOUR COPIED LINK HERE>> with it. As soon as you paste it, you’ll notice the window in the background will display the preview after a little bit, which lets you know it’s working:
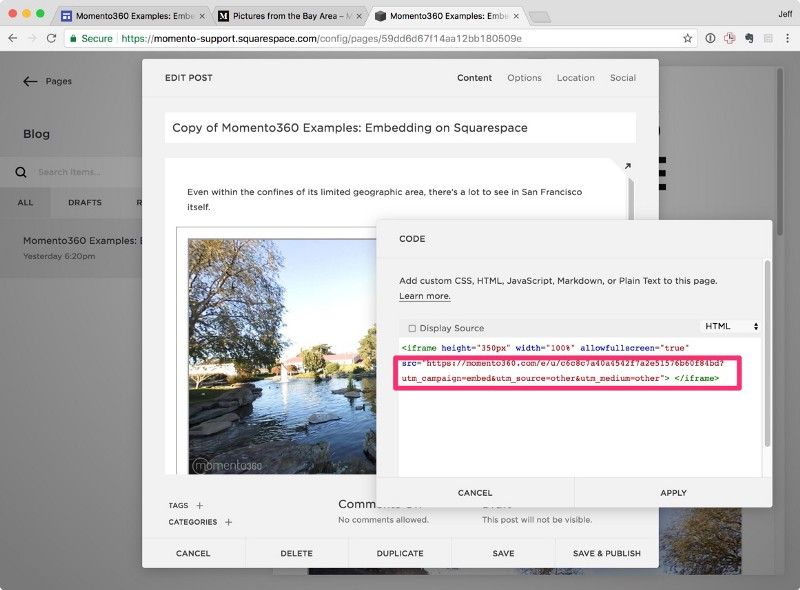
Note: If you want to adjust other options, like the height or width of the image, go ahead and change the height and width values to what you want.
Click the Apply button to close the dialog, and you should see the 360 in your post/on the page:
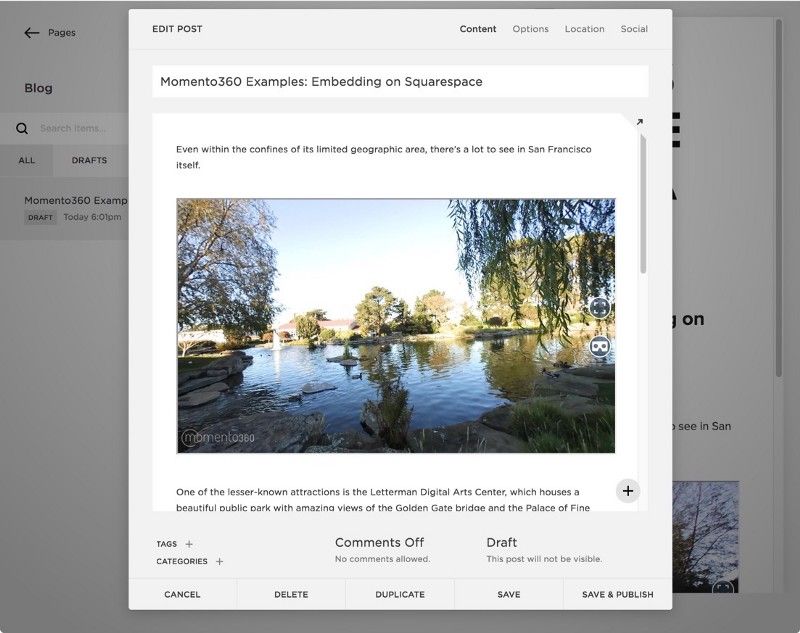
Note that the ability to drag around the frame is disabled in edit mode. When you publish or preview the site, though, you and your visitors will be able to drag around the picture like normal.
You can follow the same steps to embed a Momento360 collection on your Squarespace site the same way:
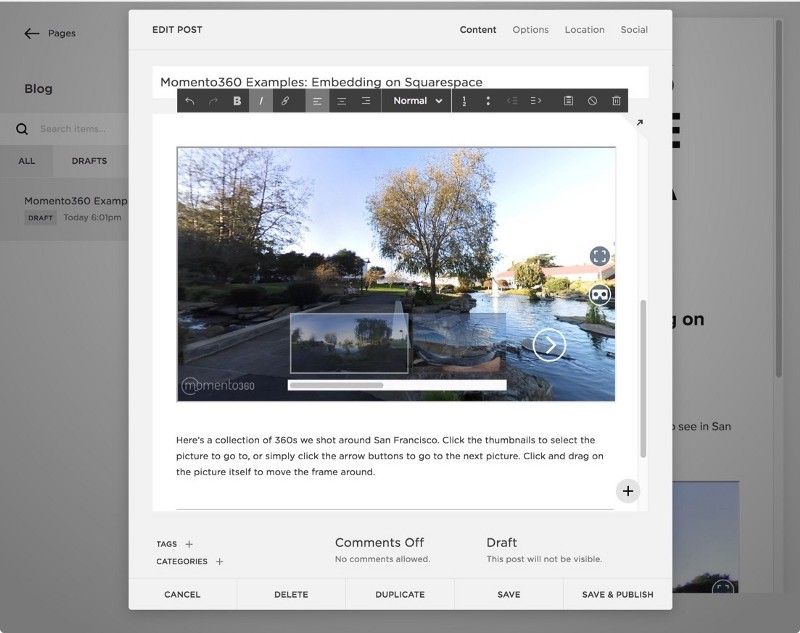
Now when you hit “Publish” you’ll be all set!
If you’re curious, here’s the link to the Squarespace site we built in this tutorial.
Pro Tip: Momento360 also supports embedding 360-degree photos in other website services or on your own site. Here’s how:
Momento360 enables you to make the most of your 360 photos and videos. Upload, view, and share — privately or publicly — on the web and in VR.

