How to embed 360 photos in your Wordpress site
Show your 360 photos using Wordpress with a few steps
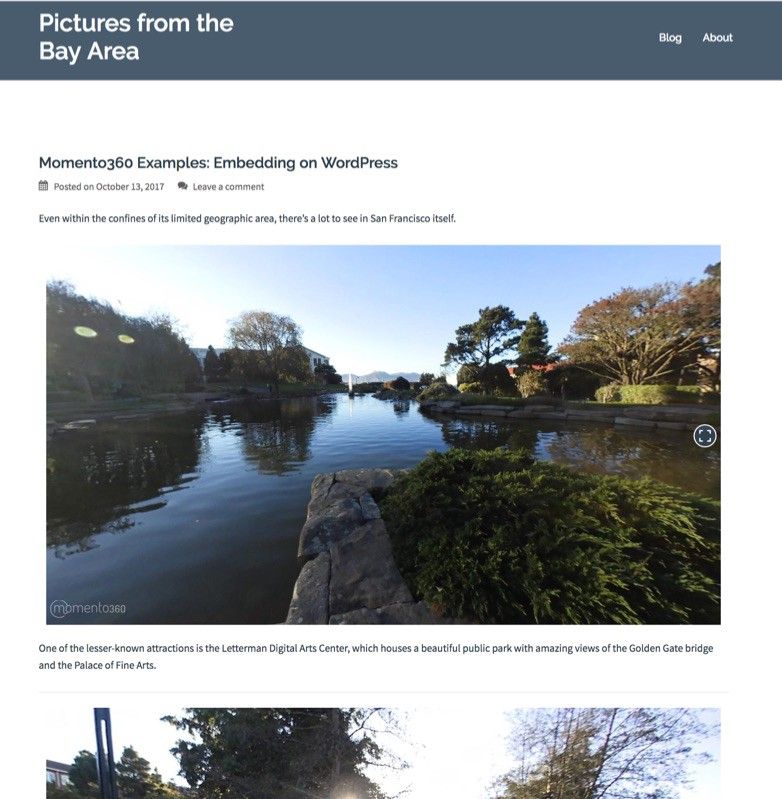
Show your 360 photos on Wordpress with a few steps
You’ve done the work of getting your 360 photos into the right format and resolution so they look great to you — and now you want to show your audience on the web. But how are you going to do that when most services currently assume all images are flat and non-spherical?
Never fear — it’s actually pretty easy! Here we’ll give you a step-by-step tutorial of how to embed 360s into your own site if you use Wordpress, using Momento360. Wordpress is one of the world’s most popular publishing platforms.
1. Download your photos from your 360 camera to your computer or smartphone
Your 360 camera will have options that let you connect to your devices to make transferring photos easy. Momento360 supports any 360 images (e.g. renderings, drone panoramas, etc.)
2. Sign up for a Momento360 account if you haven’t already
Momento360 is a free, easy, and private way to upload, view, and share your 360 photos and videos all in one place (all from your browser).
3. Upload the media from your device to Momento360
Sign in, click on the camera icon in the top right corner or navigate to the My Media tab. You’ll then be prompted to choose the media you want to upload. On desktop, you can select multiple files at once to upload.
4. Select the image you want to embed
From the My Media section, click on the photo or collection you want to embed. Then click on share button and select the “Share or Embed a Link” option:
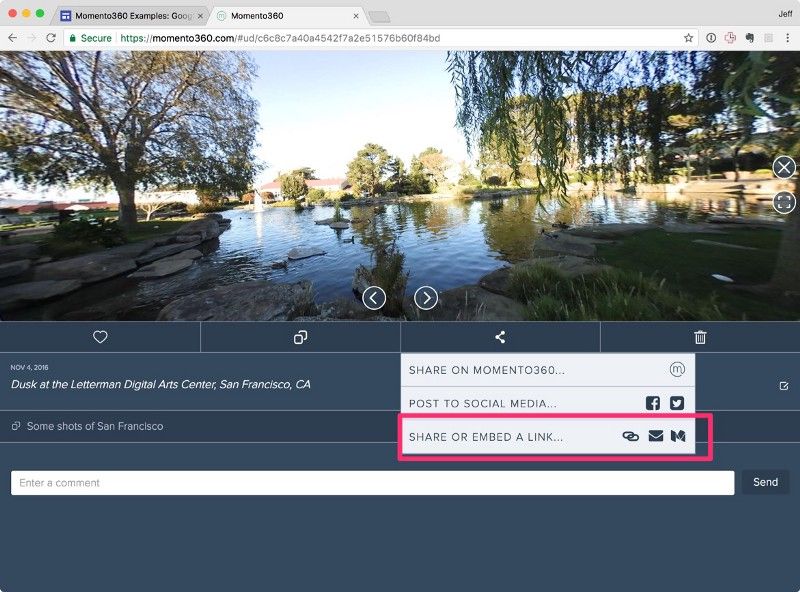
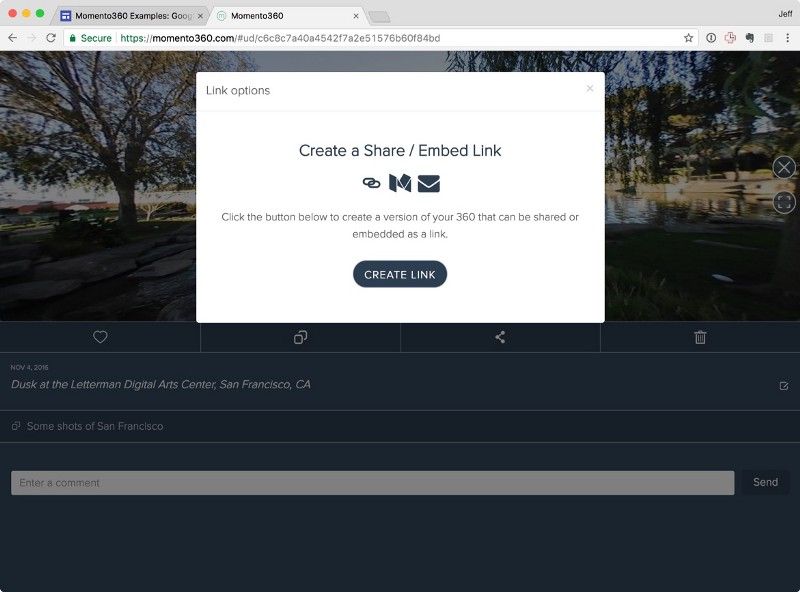
5. Generate the embeddable link
Click the “Create Link” button in the dialog that pops up.
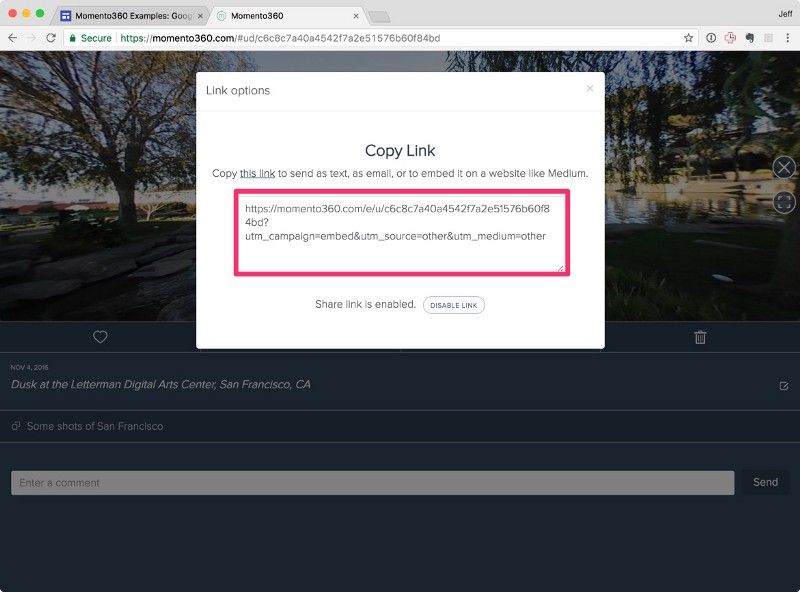
Copy the link from the text box. You’ll use this in the next step. (You can preview it by clicking the “this link” hyperlink to open it in a new browser tab.)
6. On your Wordpress site, install the Momentopress plugin
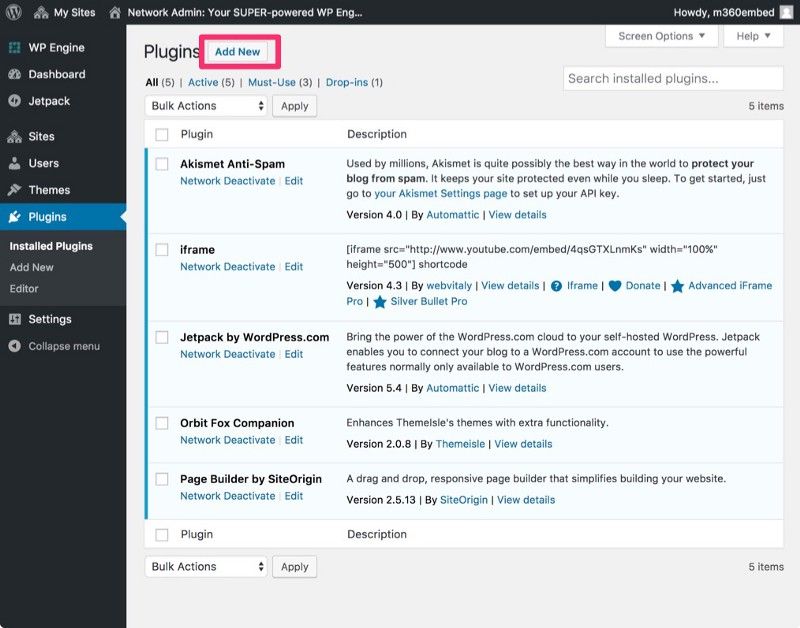
Chris Yee has written a Wordpress plugin (thanks Chris!) to make the process of adding 360s from Momento360 much easier. You’ll need to have permissions to install plugins to do this. Go to your Plugins dashboard, and click the “Add New” button.
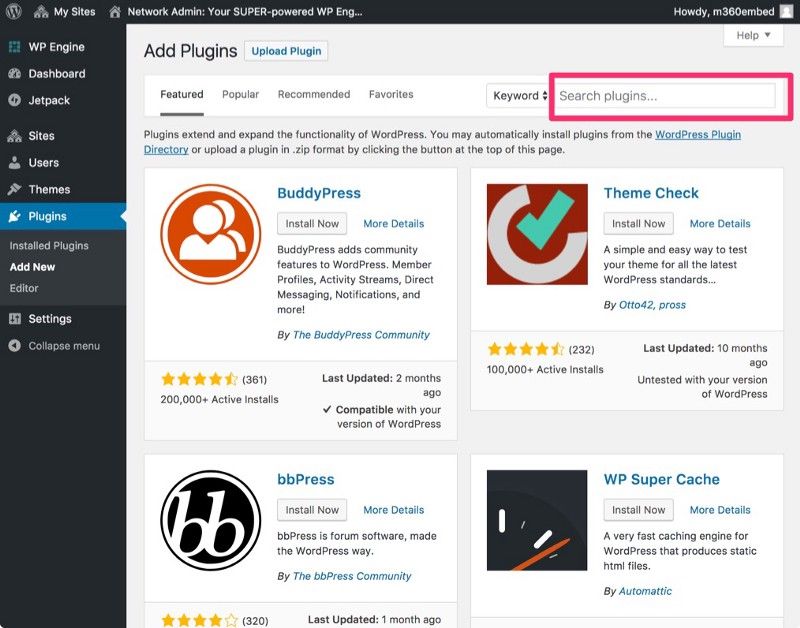
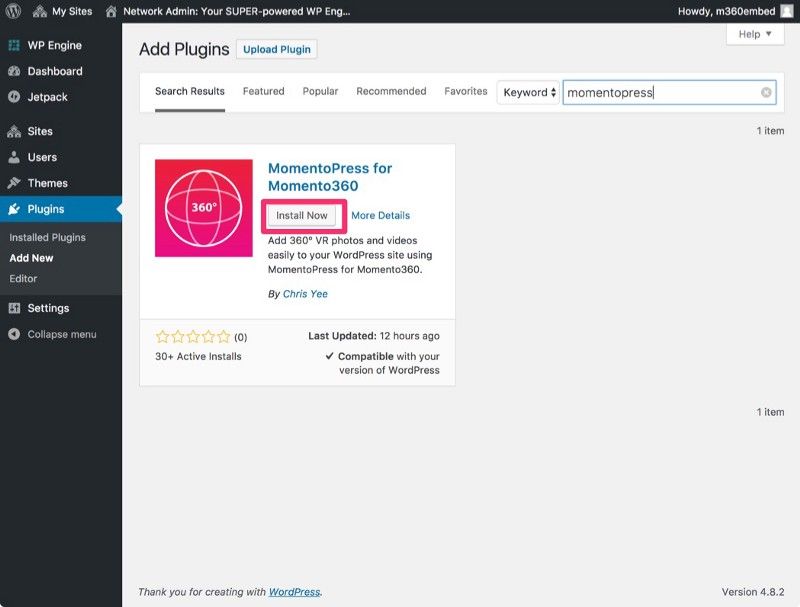
In the Search box, type in “Momentopress” — you should see the plugin entry come up. Click the “Install Now” button.
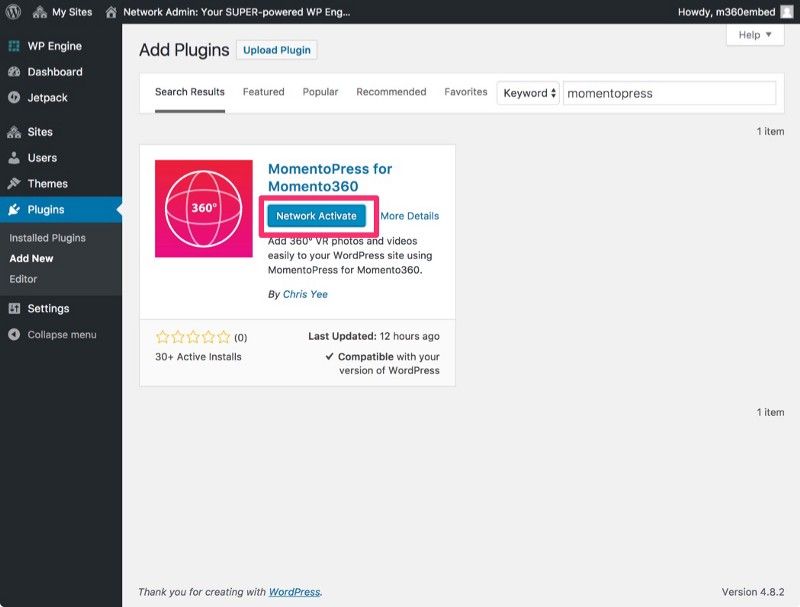
Once the install completes, then click the “Activate” button to activate it:
You’ll be returned to your Plugin dashboard page; verify that the plugin was activated and installed. You should see it among your list of plugins:
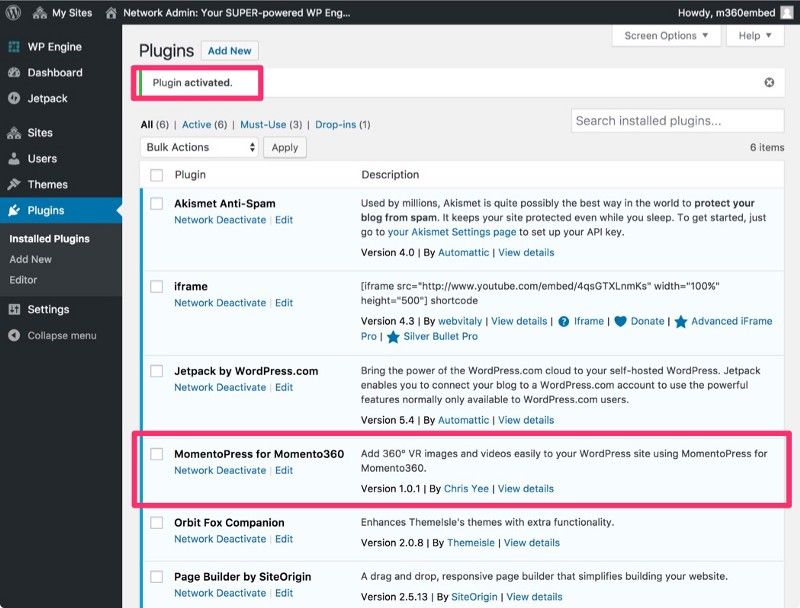
Now you’re ready to add some 360s!
7. In Wordpress, create your blog post (or page)
When you come to the section where you want to add your 360 content, copy and paste this snippet:
[momentopress url=<<INSERT URL HERE>>]
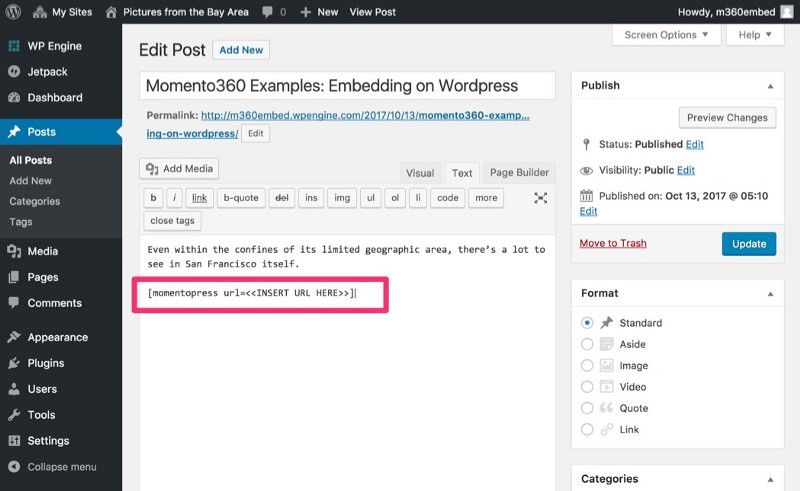
Next, take the link that you copied from Momento360 in Step 5, and replace the <<INSERT URL HERE>> text with it.
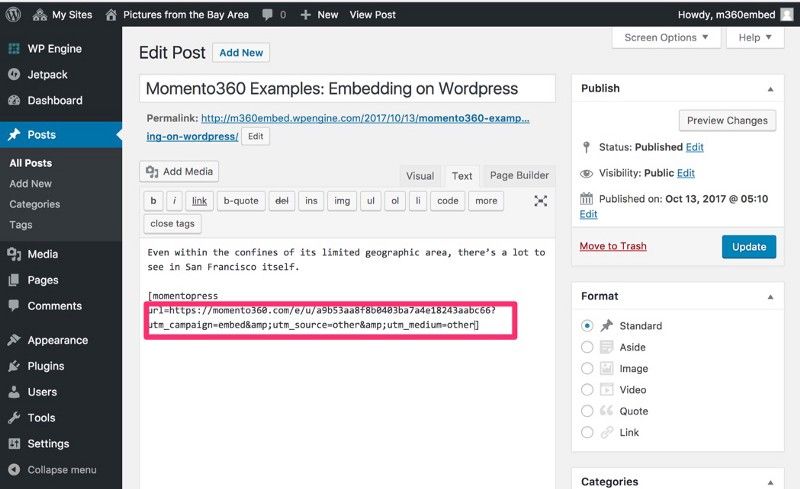
If you want to verify that you have it right, click the “Preview Changes” button in the upper right corner; you should see the 360 render on a new tab.
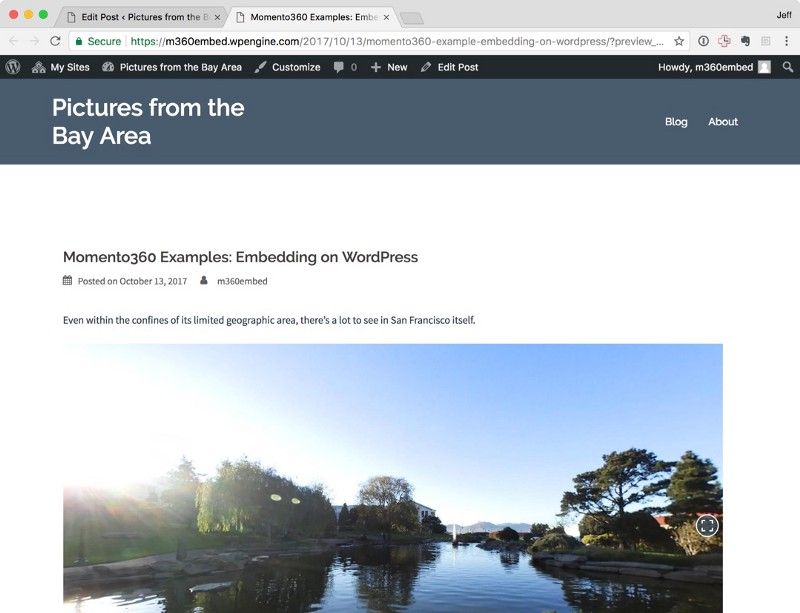
You can follow the same steps to embed a Momento360 collection on your Wordpress site the same way:
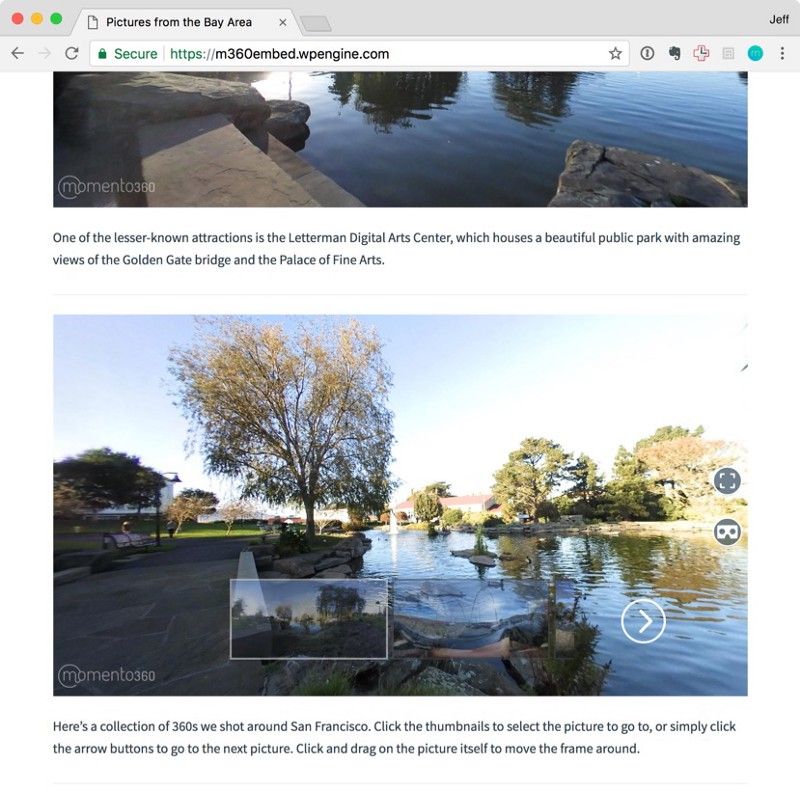
The steps for adding 360s are the same for both blog posts and page elements.
Now when you hit “Publish” you’ll be all set!
If you’re curious, here’s the link to the Wordpress site we built in this tutorial. We used the steps above to add the 360s in the blog post, as well as the About page.
Pro Tip: Momento360 also supports embedding 360-degree photos in other website services or on your own site. Here’s how:
Momento360 enables you to make the most of your 360 photos and videos. Upload, view, and share — privately or publicly — on the web and in VR.

